Organizations have already applied Microsoft Teams as the main tool for phone and video conferencing, file sharing, and chat.
Did you know you can use Teams to do a lot more?
Today I write about an interesting solution. Teams direct routing using Ribbon.
Ribbon provides certified Microsoft SBC (Session Border Controller) required to connect Teams to a telco provider. So what does it actually mean?
Organizations can use Teams for business calls, migrating for example, from a legacy PBX, depending on their needs.
Going further – no physical SIP or VoIP phone is needed – calls can be made from almost anywhere (Internet access needed) – on any device, even browser, and yes Teams combined with Ribbon can handle everything. Below I write about a basic configuration and how you can quickly set this up and running.
How To configure
Introduction
Direct Routing lets you connect Teams with a telco provider using a supported Session Border Controller (SBC). This method allows you to use any trunk as a Phone system directly from your Teams client, whether you use your existing phone system or SIP Trunk from 3rd party providers.
SBC can be a hardware (physical server which you install in your datacenter) or a virtual appliance (a virtual machine hosted in a datacenter/cloud).

Ribbon SWe Lite is one of the certified SBCs that can be hosted in a cloud. It’s easy to install (a VM in Azure Marketplace) and configure (3 step configuration wizard) but powerful. You can enhance configuration manually to cover advanced scenarios and configurations.
As a VM in Azure it has small VM requirements (can be hosted as a B1ms machine) and deployment in a basic scenario takes 15 minutes.
Before you start
Before you create and configure a VM with Ribbon SWe Lite you must prepare a few things:
- Licensing
To use Direct Routing you must have licenses that cover the calling feature. A full list of licensing requirements is available on https://docs.microsoft.com/en-us/microsoftteams/direct-routing-plan#licensing-and-other-requirements.
- SBC domain name
To configure Direct Routing you have to prepare your domain. Teams work only with domains registered in Domains of the tenant and it cannot be *.onmicrosoft.com.
You can assign any record pointing to your SBC – for example, sbc.yourdomain.com, ribbon.yourdomain.com, countryname.yourdomain.com.
Full domain requirements are available on https://docs.microsoft.com/en-us/microsoftteams/direct-routing-plan#sbc-domain-names.
- Certificate for SBC
This is a critical step to allow Teams to connect with your SBC server. You have to create a certificate with your SBC FQDN as the common name (CN) or the subject alternative name (SAN).
The certificate must be signed by Certificate Authorities that are part of the Microsoft Trusted Root Certificate Program. Keep this in mind when you will choose the CA provider.
Details and CA Certificate list are available on https://docs.microsoft.com/en-us/microsoftteams/direct-routing-plan#public-trusted-certificate-for-the-sbc.
- SIP Trunk
The last part is SIP Trunk. You can choose SIP Trunk from your country that works with Teams. SIP Trunk provider will deliver you details about ports, authentication, required transformations, and any other settings.
Ribbon installation in Azure
To install Ribbon SWe Lite machine got to Azure Portal (https://portal.azure.com) and navigate to Marketplace. Search for “SBC Swe Lite” and select SBC Swe Lite -> Quick Launch.

In the beginning, you must provide a Resource group (use existing or create a new one) (1), select Region (2), provide machine name (3), and the select number of simultaneous calls (4). Machine size will be selected automatically based on calls numbers (it can be changed later).

The next steps (Settings and Networking) contain information prepopulated from the machine template and are based on selected calls number. You can change it manually.

In the last step, you must provide username and password (1,2), DNS Host Name (3), and Domain Name (4).

Now you can Review machine settings and Create it. It will take a few minutes.
When the deployment is finished you will get information about the machine and all parameters.
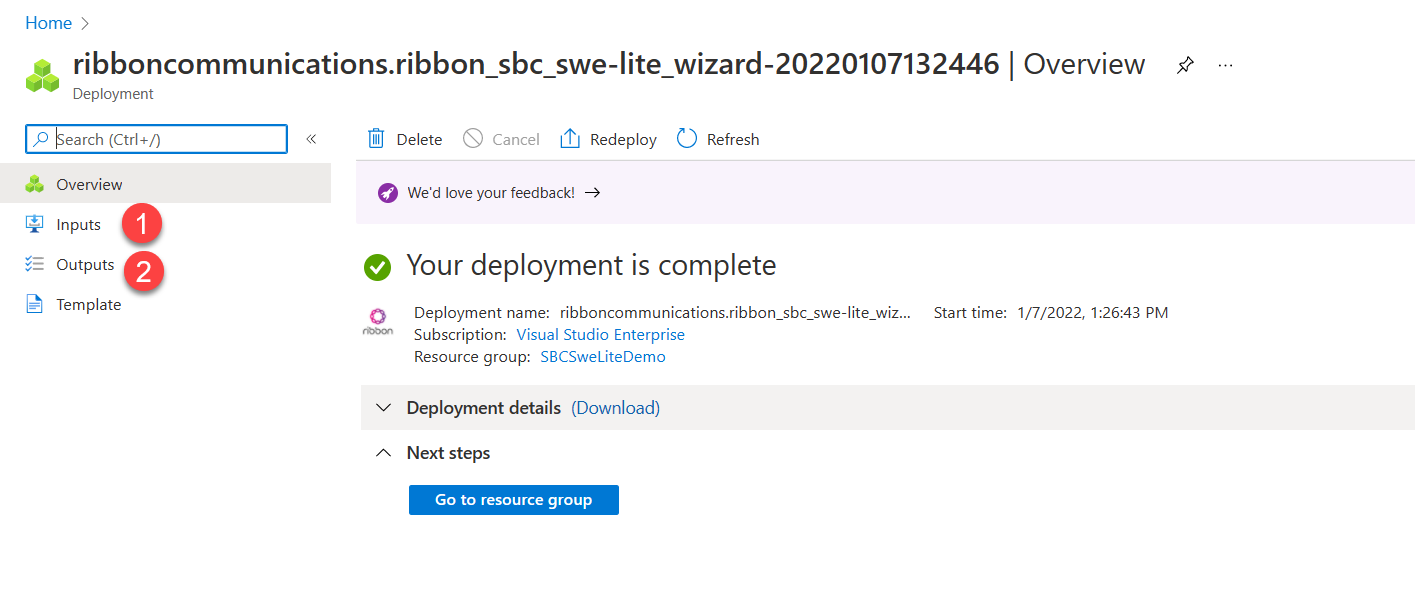
- Inputs section contains all parameters selected during the configuration
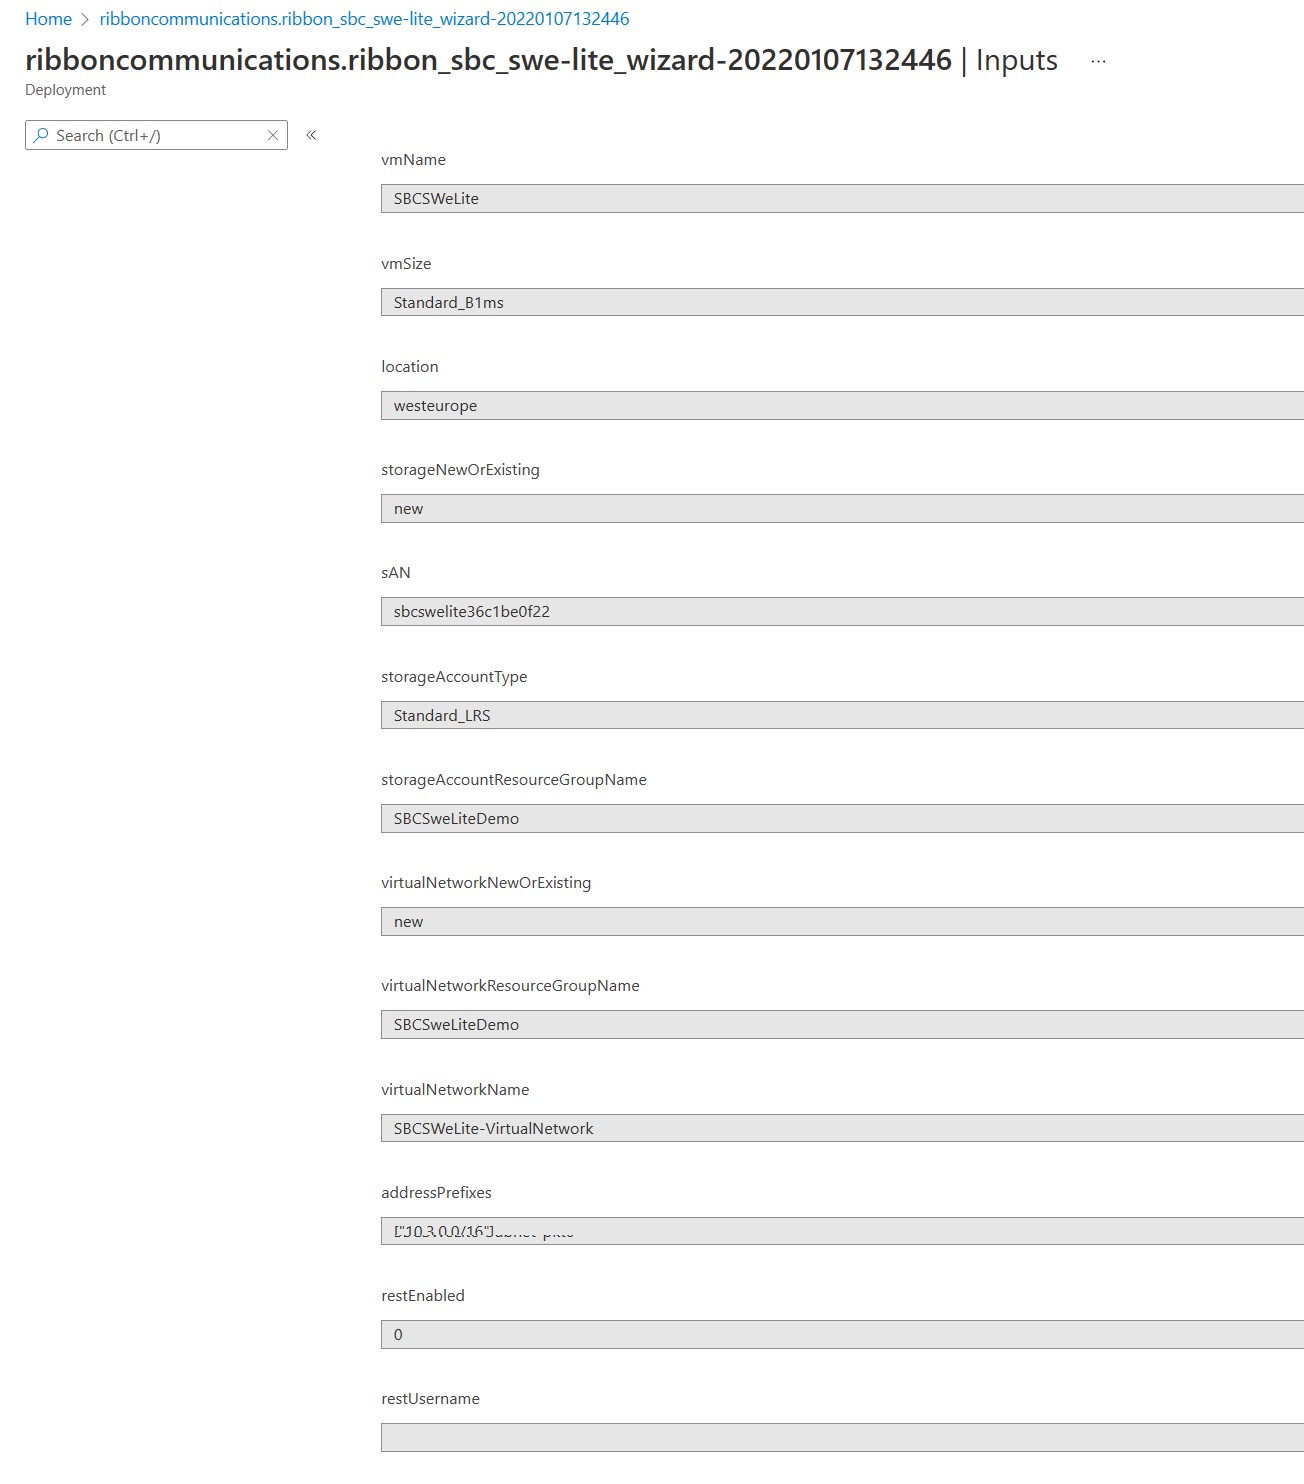
2.Outputs section contains basic information about your machine – FQDN and IP address. You will use the FQDN to access the portal administration site.

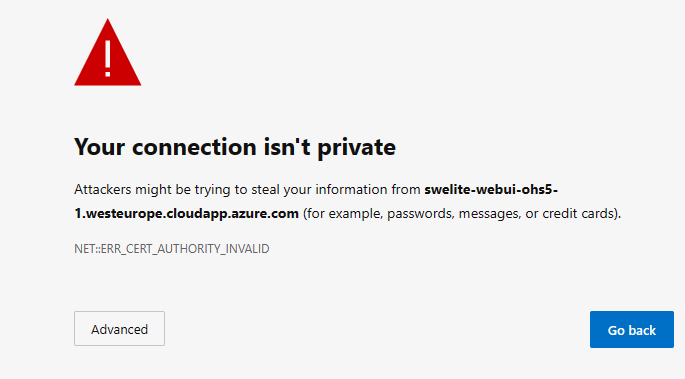
Now you can paste in a web browser the FQDN and sign on for the first time. In the beginning, you will get a warning about entering a not secure site. It is because the site has not any valid certificates (you can install the certificate after the first log on). Simply ignore the alert and enter the site.
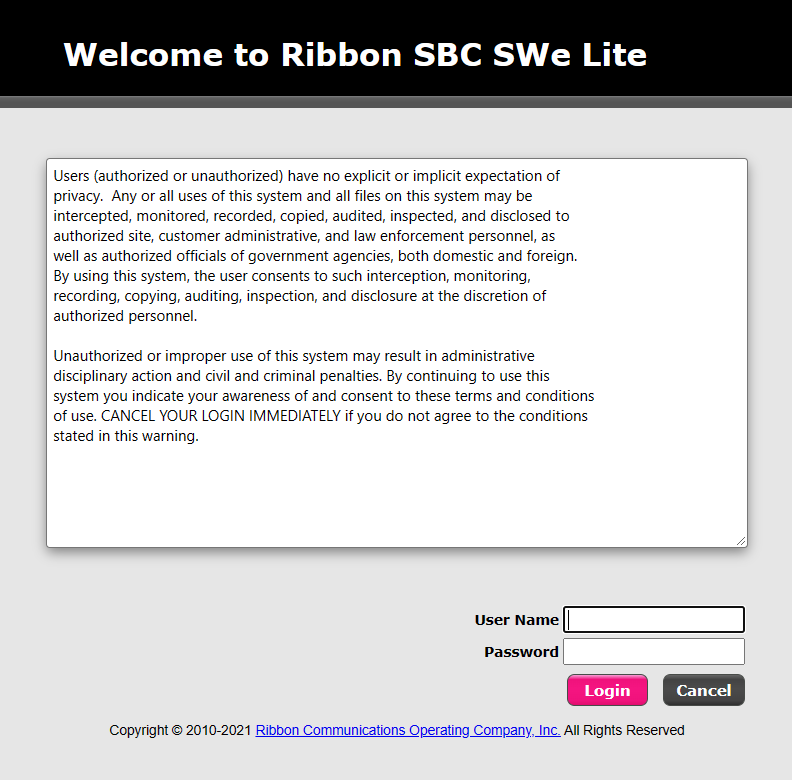
Now you can type your username and password. In the beginning, you will have to change your password.
Configuration with Teams
- Certifications
Now you can configure Ribbon itself. The first step is to upload certificates to the cert store in the Ribbon panel. To do this go to SBC Easy Setup in the left-hand navigation and select Certificates settings.

In this section, you can upload required certificates using the import option.

- Configuration wizard
The next step is to configure SBC to work with Teams and your SIP Trunk. To do this open Easy Config Wizard in SBC Easy Setup. Using this wizard you can configure the basic setup in 2 minutes. Anytime later you can modify this configuration in the Settings menu.

In Step 1 you must select basic parameters.
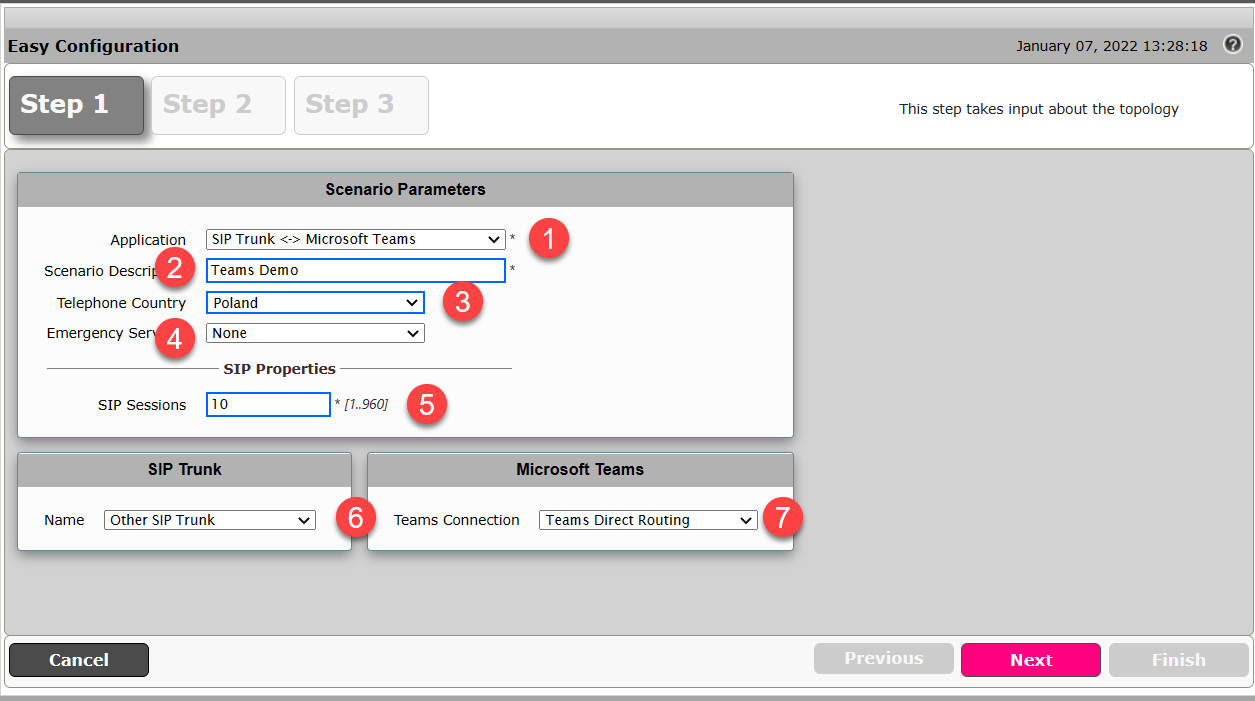
1.Select application type – in this scenario I selected SIP Trunk <-> Microsoft Teams
2.Provide a name for your configuration
3.Select Country
4.Select Emergency Service
5.Enter SIP sessions
6.Select SIP Trunk type
7.Select Teams Connection
In Step 2 you configure SIP Trunk and Teams Direct Routing settings
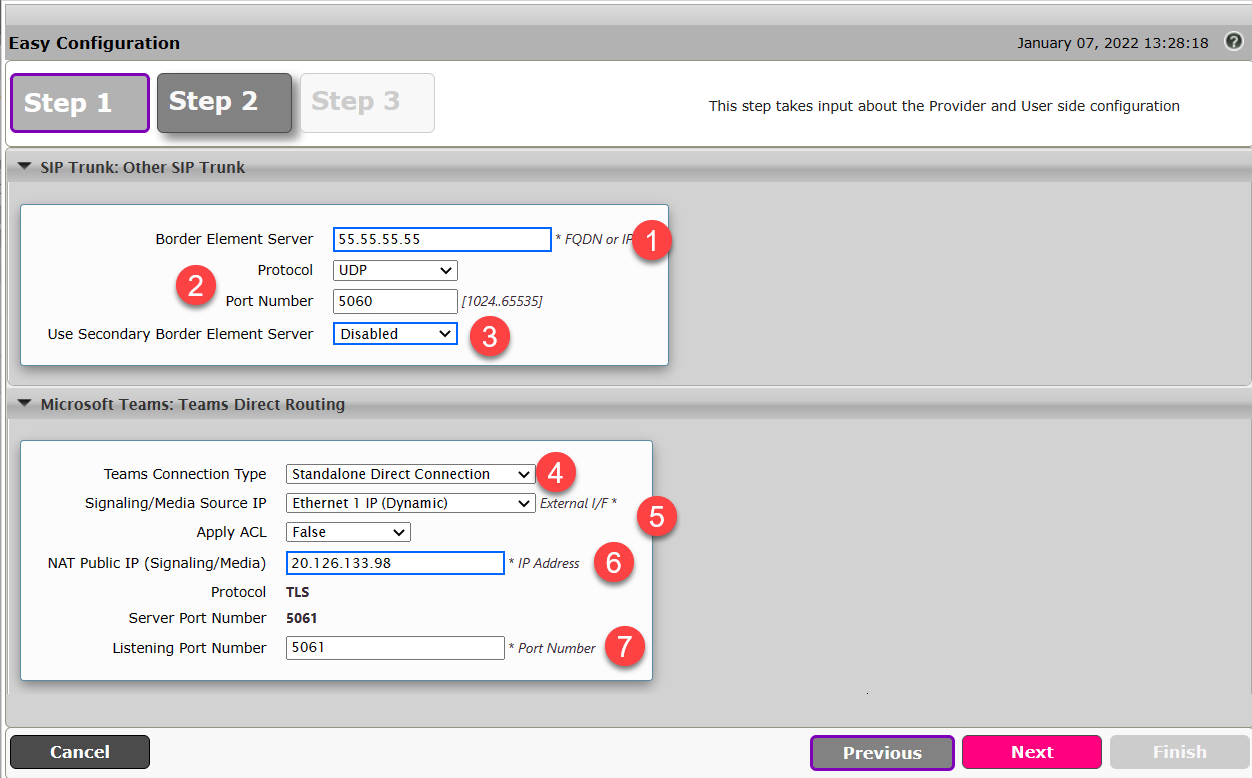
1.Enter the IP address for your SIP Trunk
2.Select Protocol and port number if needed (by default it’s UPD:5060)
3.Specify if you need additional SBC or work with a single instance
4.Select Teams Connection Type
5.Select Signaling Source IP and ACL if needed (default options are prepopulated)
6.Provide IP Address of your Ribbon VM in Azure
7.Modify Listening Port if needed
Step 3 allows you to confirm all information provided in previous steps and deploy the configuration.
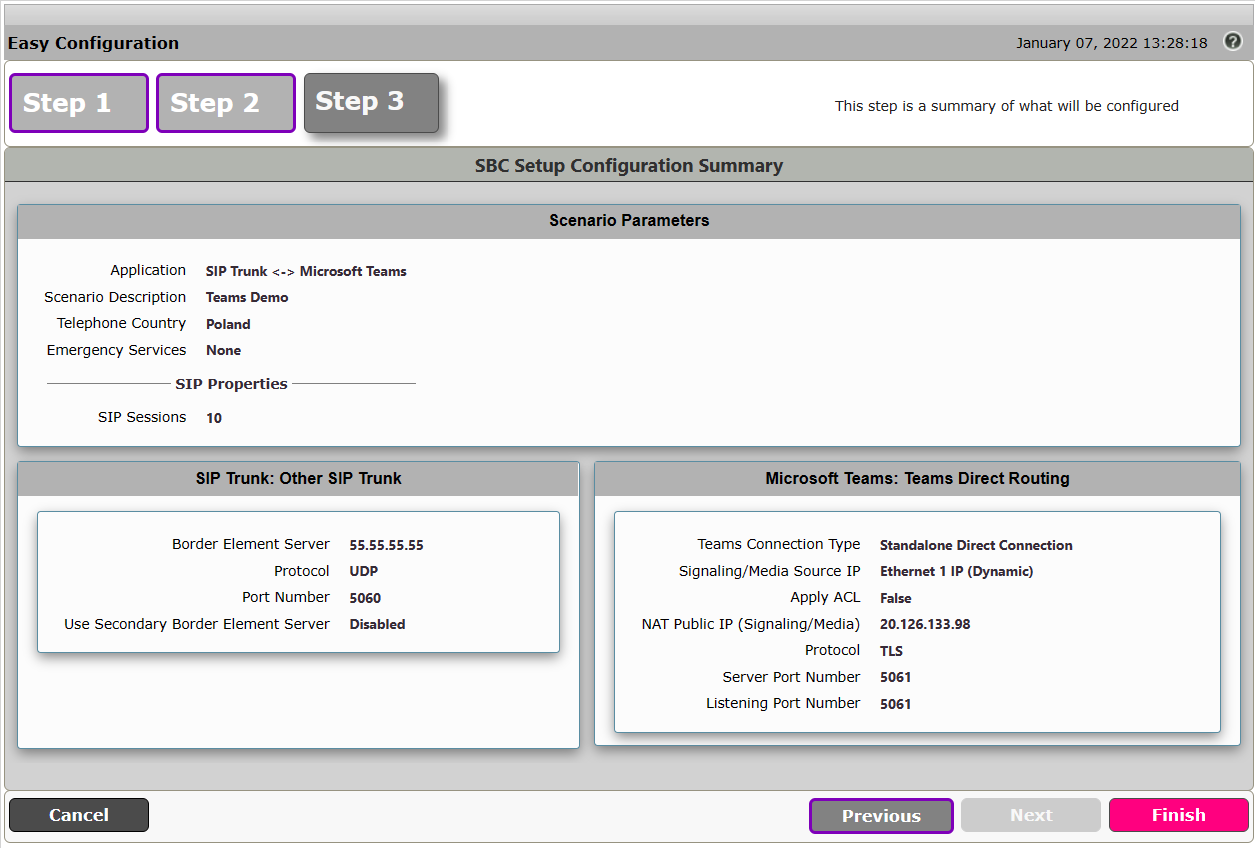
- Translation rules
The default configuration does not translate numbers between SIP Trunk and Teams. If your SIP Trunk provider required some additional translations, you can configure it in the Settings panel.
Expand Call Routing -> Transformation and select the required direction (From Teams or From SIP Trunk)
Now you can modify numbers transformation using regular expression.

1.Sample rules from Teams
2.Input field regular expression
3.Output field regular expression
Configuration Teams
Now our SBC is ready to work with Teams Direct Routing. The next step is to configure Direct Routing in Teams Admin Center. You can find details on the Microsoft docs page – https://docs.microsoft.com/en-us/microsoftteams/direct-routing-configure.
When it’s ready you can test your configuration. Navigate to Teams and select Calls from the left-hand navigation.
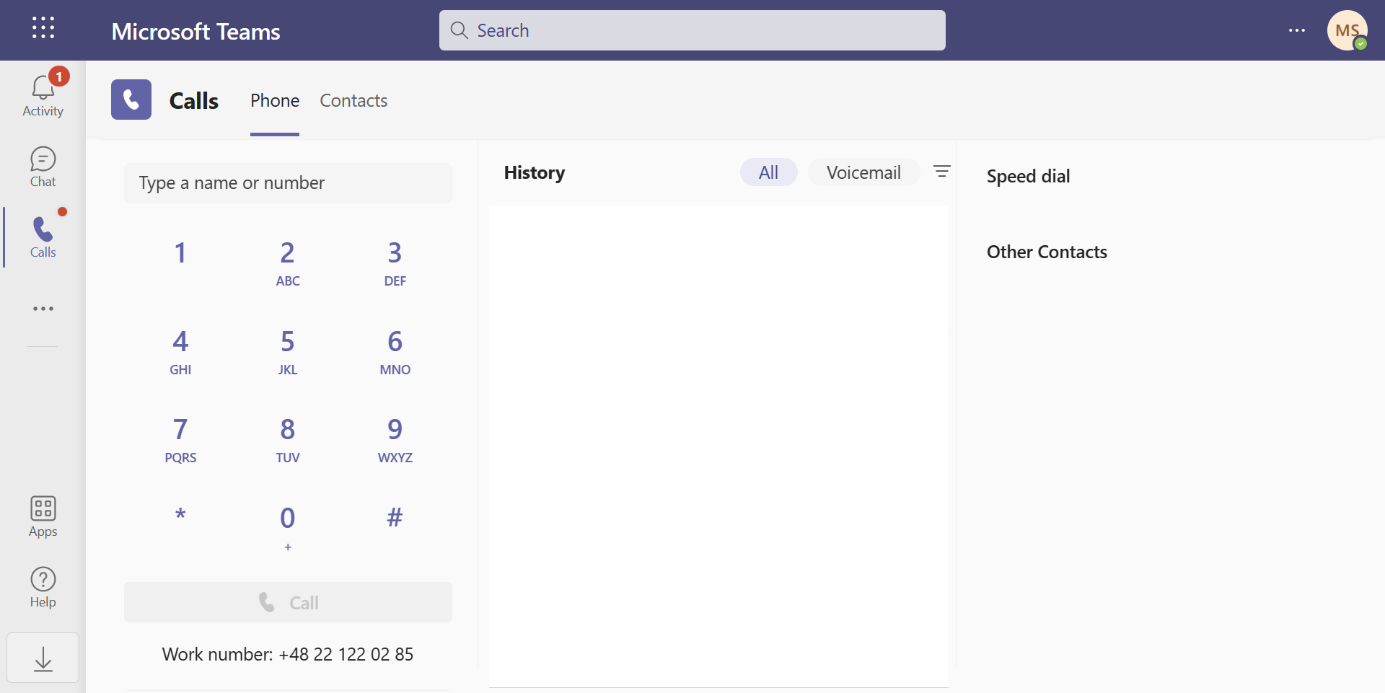
Type a number and make a test call!

Summary
Deploying and configuring SBC SWe Lite is fast and easy. If your scenario is simple and does not require advanced translations or configurations, you can finish it in 15 minutes. Keep in mind that you have to configure/prepare additional tasks (domains, certificates, Teams Direct Routing configurations). Those tasks can consume much more time.
The clear list benefits we observe right away:
- no physical sip phone needed – make and receive calls from anywhere
- no need to deploy enterprise solutions and purchase support every year to keep the system updated
- flexibility – you can turn off and turn on licenses any time
- calls analytics – you can easily check who calls where and when
- we can set outbound/inbound rules – for instance, HR cannot call to India, Sales cannot call to the US
We’ve already implemented the solution for one of our clients. If you consider implementing a VoIP system for your staff whether sales, call center, or customer service it’s worth investigating this alternative, drop me a line here if you’d like to learn more details on the cost and more complex implementations.
 PL
PL